
Supplies:
- wood round (found in the wood section at most craft stores)
- chalkboard paint (I used Rust-Oleum Brush-On Chalkboard Paint)
- foam brush or roller
- chalk

Step 1: Paint one side of the wood with chalkboard paint. I painted two layers, letting them dry about 4 hours in between coats. Be sure to check the label for specific manufacturer’s instructions.

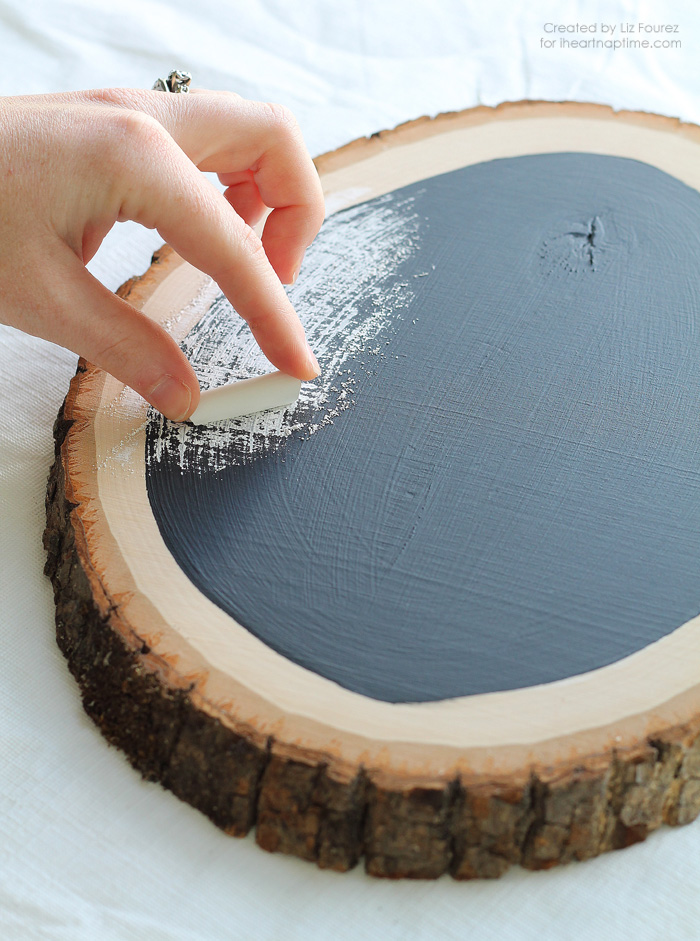
Step 2: Wait 3 days for the last coat of paint to fully cure before using the chalkboard. Then prepare the chalkboard by “seasoning” it… just rub the long side of a piece of chalk all over the painted area until the entire surface is covered. Then use a clean cloth or paper towel to wipe away all the excess chalk dust, and you’re ready to write or draw on the sign!
You can display your new chalkboard on a table or bookshelf, or you could also add a hanger to the back and hang in on the wall.

See the full post at I Heart Naptime.

No comments:
Post a Comment